 |
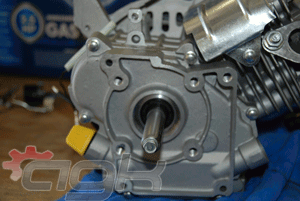
This is the 79cc 2.5hp Harbor Freight engine. The first performance step we like to take with this engine is removing the governor. These engines will turn 3600 rpm from the factory. Removing the governor will allow the engine to turn over 5000 rpm. Please understand there is a safety consideration when removing the governor and running an engine at an rpm it was not designed for. Take all the safety precautions possible when altering an engine and using it in a manner it was not designed for. |
 |
We start the governor removal process by removing the six side cover bolts. Pull the side cover off slowly. You can usually save the side cover gasket if the engine is new or has very low hours on it. Sometimes the camshaft will want to come out with the side cover. If this happens the lifters may fall out too. Not to worry as the lifters and camshaft go right back in place. |
 |
This is what you will see when the side cover has been removed. The big plastic gear on the right is the camshaft. The crankshaft is in the center. And the governor you are looking for is the plastic gear in the upper left. |
 |
Disconnect the stock throttle rod and governor springs from the top of the engine. The stock throttle rod is connected to a metal pivot arm that goes down into the engine block. Remove this metal arm. You may have to rotate the crankshaft to pull the arm down into the block. If you can't find the clearance you need to drop the metal arm out of the block just cut the top of it off with a dremel cutting tool and then lower the arm out of the block. You will need to plug the hole left in the block with a bolt as seen in this picture. |
 |
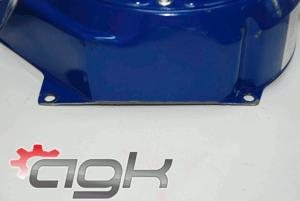
Now you can remove the blower housing. We trim the bottom of the housing because this portion hangs down lower than the engine block and does not allow the engine to sit flat on a motor plate. After trimming about 1/16" off the bottom edge our engine will have a flat surface to sit level on a motor plate. |
 |
After the blower housing has been removed you can remove the flywheel. Using an impact wrench works great for this. Once the flywheel nut is removed the starter cup and plastic fan will come off. You will need to thread the nut back onto the crankshaft and give it a solid tap with a hammer to break the flywheel off of its taper. Be careful not to damage the threads on the crankshaft. |
 |
With the flywheel removed you have exposed the pin that holds the governor gear in place. Tap this pin out of the block. The pin and governor gear will fall into the block. Be sure to remove ALL of the governor parts from the block. There is a small black washer placed between the governor gear and engine block that could get loose in your engine. Double and triple check that all of the parts get removed. |
 |
Here is the governor assembly after being removed from the engine. |
 |
You need to plug this hole with a bolt too. When plugging holes in the block make sure you use a bolt that will not interfere with anything inside the engine. You can tap the hole so the bolt will thread in. Other methods for securing the bolt in the block can be used as well just be sure the bolt seals the hole so you do not have oil leaking out. Also be sure the bolt cannot fall into your engine block. |
 |
While we are in the engine we also remove the low oil sensor. We do this because the sensor will shut the engine off when you don't want it to. When you are going into a turn the oil in your engine will push to one side triggering the sensor. Removing the sensor will eliminate that problem. |
 |
Now it's time to put the engine back together. Start by installing the flywheel, plastic fan and starter cup. Install the blower housing. If your cam fell out you need to install it with the timing marks lined up. The cam gear and the crank gear have small dimples (timing marks) that need to be aligned. It's probably difficult to see in this picture, but we have the marks lined up. The side cover goes on next. You will need to setup new throttle linkage. Checking the valve lash is a good idea too. We will cover these areas in separate how-to articles. |


